It’s not hard to make Windows 10 faster. Here are several methods to improve the speed and performance of Windows 10.
BY KANNON YAMADA
Making Windows 10 perform faster isn’t hard. You just need a few simple tips and tricks. This article covers several methods to make Windows 10 faster and improve its performance.
The Main Focus Areas to Make Windows 10 Faster
There are three umbrella categories for optimizing Windows 10’s performance:
- Operating system tweaks
- Software enhancements
- App replacement or removal
While hardware upgrades also work, like buying more RAM or investing in an SSD, those cost money, so we’re going to skip them. Let’s start with the most effective ways to speed up Windows 10.
Windows 10 Operating System Speed Tweaks
1. Turn On Game Mode
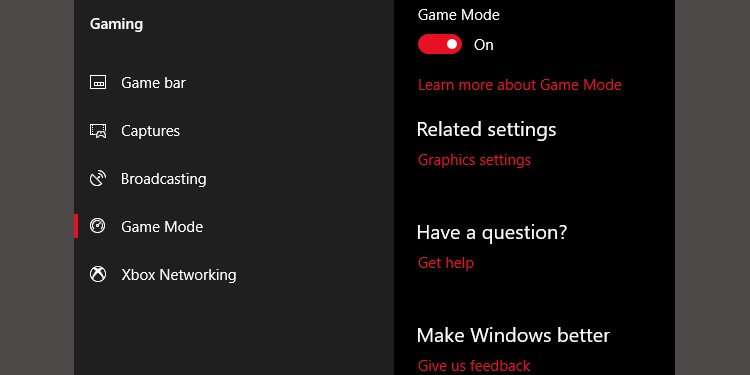
The latest version of Windows 10, the Creators Update, adds a new feature known as Game Mode. There’s no way to perpetually run in Game Mode, unfortunately, but you can activate it by pressing Windows Key + G. However, you must first enable Game Mode.
To enable Game Mode (it’s only available in Windows 10 Creators Update) open Settings > Gaming and choose Game Mode. Tap the toggle switch below Game Mode.
It’s only supposed to be used for games, but you can activate it whenever you need to get a little burst of speed. It’s particularly useful if you have a lot of background apps that are dragging down a resource-intensive program.
Unfortunately, Game Mode only improves gaming performance by a few percentage points.
Even so, some of you will experience a greater performance boost than others. The reduced number of background apps may improve your performance where no other tricks would help. In theory, Game Mode can function within any application that uses GPU acceleration. If you want to try it out in Adobe Premiere, give it a try.
2. Turn Off Visual Effects
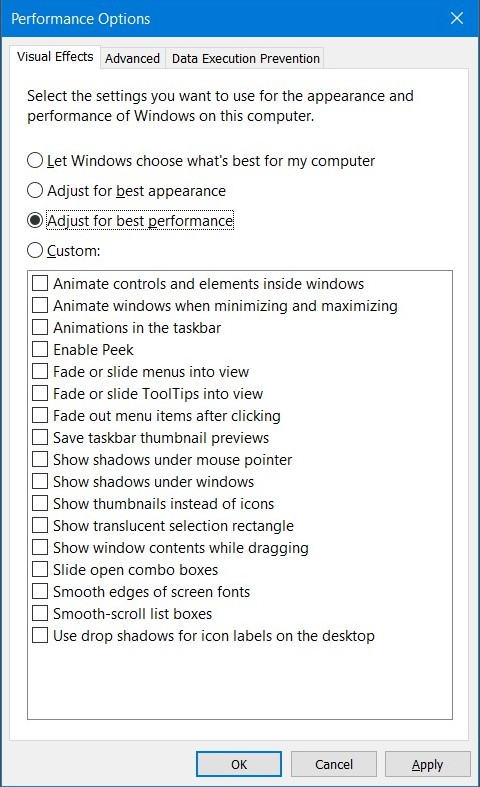
Windows offers a really easy way to shut off all visual enhancements.
- Navigate to System > Advanced system settings.
- Choose Advanced from the tabs above.
- Under Performance, choose Settings.
- Left-click on the radio button for Adjust for best performance to shut off all visual effects.
Disabling visual effects disabled on a few systems seems to make a big impact, particularly on older computers. On the downside, things won’t look as nice. We advise leaving Smooth edges of screen fonts enabled as it helps when reading text.
3. Speed Up Your Processor
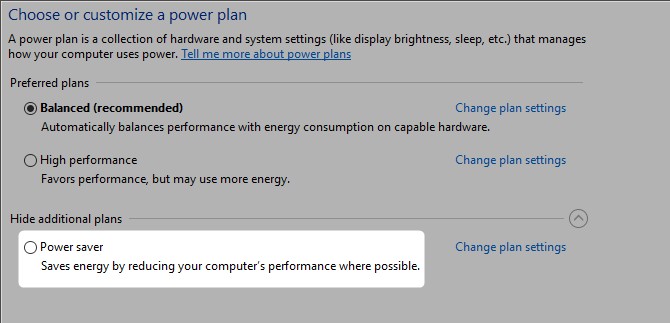
Windows has three default settings for how your processor ramps up its frequency. The three defaults are Balanced, High performance, and Power saver. Sometimes manufacturers also include custom plans here.
You are almost always better off on a laptop using the Balanced or Power saver plans, but High performance can make Windows faster by trading battery endurance for power. Because it consumes the most amount of power it’s also more appropriate for desktops.
You can alter your settings by navigating to Power Options in the Control Panel.
4. Turn Off Auto-Starting Programs
When you install a program, it sometimes tries to run silently in the background. That’s fine for just a handful of programs, but the impact on performance adds up. With enough auto-starting programs running, the entire system gets bogged down.
Getting rid of non-essential startup software is absolutely essential for performance. Fortunately, Windows makes it easy to remove most auto-starters.
To remove auto-starting apps, take the following actions:
- Press Ctrl + Shift + Esc to enter the Windows Task Manager.
- Select the Startup tab from the top of the screen.
- From the Startup tab, you can eliminate most auto-starting applications.
The majority of apps out there don’t need to run in the background unless they come preinstalled with your computer (and even these are oftentimes bloatware). Unfortunately, some programs hide in other locations, but you can find and eliminate stealth auto-starters as well.
5. Check Your Internet Connection
One of the biggest causes of slow internet speeds isn’t your provider. It’s your Wi-Fi connection. Thanks to common issues like channel congestion and overlapping Wi-Fi signals, it can be difficult getting a stable signal if you live in an apartment complex.
Fortunately, most routers offer two features that can improve your connection’s speed and stability. You can either use a wired connection or change your router’s channel.
Configuring a wired connection is simple: just buy an Ethernet cable and plug it in. Changing a router’s channel, while also easy, requires a more in-depth explanation.
First, use Microsoft’s Wi-Fi analyzer tool to determine which channels work best for your computer, and second, go into your router’s settings to change the channel.
Check out a great video on how to do it:
6. Manage Windows Update for Performance
Windows Update hogs resources when it runs in the background. You can configure it to run only at specific times. For example, when the device isn’t in operation. That means no more restarts while you’re in the middle of an important task.
Change Active Hours
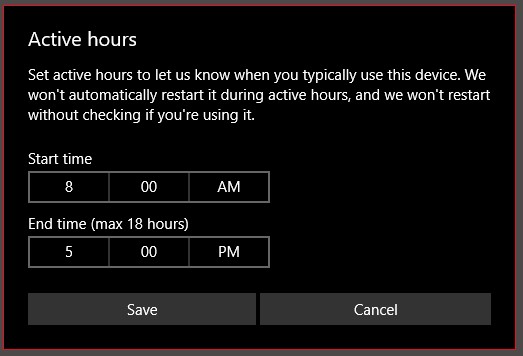
To configure Windows Update to run only at specific hours:
- Type Windows Update settings into the Windows Search Bar and run the configuration utility.
- Under the heading Update settings, choose Change active hours.
- You can change the active hours on this menu by clicking on Change Active Hours. We advise changing it to a time period when the computer is on but unused.
This setting only limits the times during which Windows will install updates automatically. Windows Update will still download updates during those hours.
Set Your Internet Connection to Metered
If you have a limited bandwidth Wi-Fi connection, Windows Update can significantly impact your internet performance by downloading updates in the background.
You can prevent this by setting your connection to metered; this will disable Windows Update, though some security patches may still download.
- Open Windows Settings using Windows Key + I.
- Go to Network & Internet > Wi-Fi.
- Select the network you’re currently connected to and under Metered connection > Set as metered connection turn the switch On.
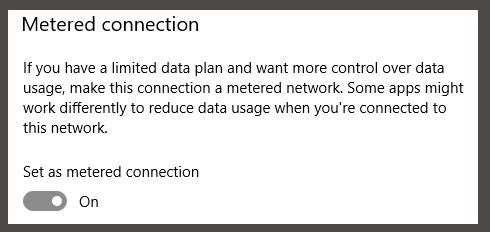
This only works with Wi-Fi networks, though a hack for applying this setting to Ethernet connections does exist.
7. Turn Off Windows 10’s Search Indexing Feature
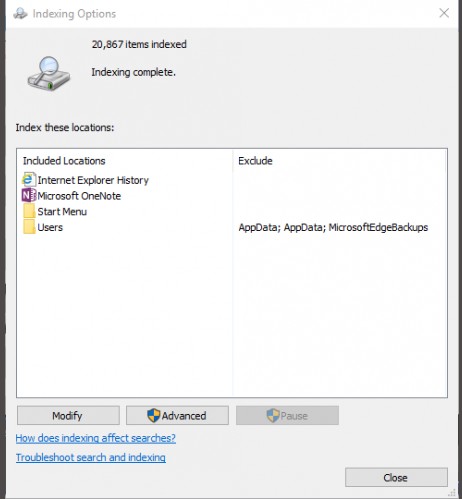
When you search for a file, Windows doesn’t scan every directory on your computer if you have indexing enabled. Indexing creates a text manifest of the items stored on your computer. It dramatically improves file search speed.
On semi-recent computers, it’s best not to turn indexing off. There’s little benefit. Even on a modern computer, turning off Windows 10’s indexing feature will significantly slow down searches of your storage drive for very little performance gain.
On the other hand, if you own a very old computer, turning off Search Indexing will help your system’s performance.
To turn off Windows 10’s Search Index tool:
- Type Index into the Windows Search Tool and left-click Indexing Options.
- Left-click Modify at the bottom of the menu and uncheck the boxes for all of the options listed here.
8. Speed Up Windows With Storage Analyzers and Disk Cleaning Tools
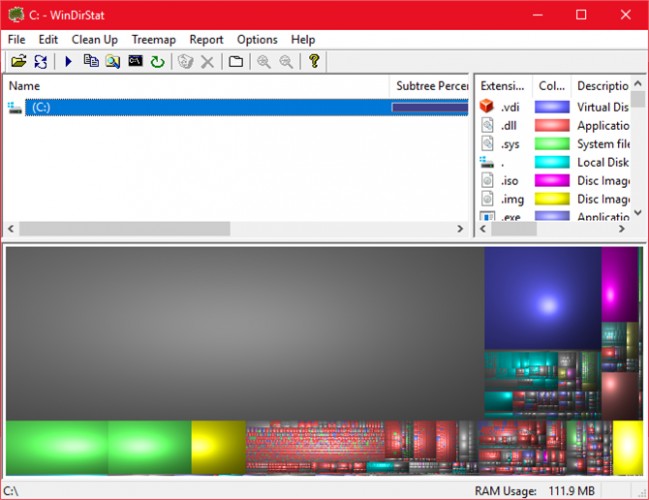
Both Solid State Drives (SSDs) and Hard Disk Drives (HDDs) slow down when overloaded with data. Both drive technologies like to sit around 50% capacity for optimal performance but anything around 25% free capacity is fine.
One of the best apps for cleaning up an overloaded disk is WinDirStat. WinDirStat is both completely free, open-source, and available in both installed and portable versions.
Download: WinDirStat for Windows (Free)
Windows 10 Software Enhancements
9. RAM Drive
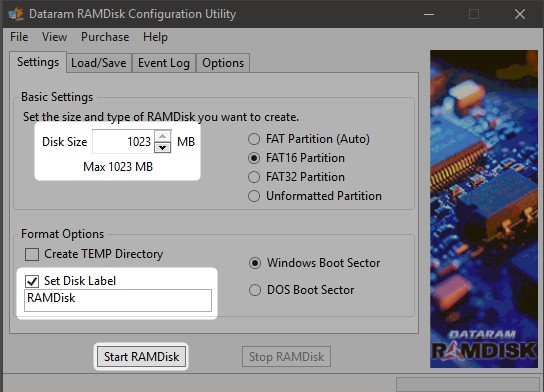
Out of all the apps out there that claim to improve performance, no program does it better than a RAM drive. A RAM drive program creates a virtual drive using physical RAM, which is obscenely fast. Users then move parts of essential software to the RAM disk, which results in large gains in speed.
However, we advise RAM drive usage only for those who want to improve the performance of a single application. The most important examples of software that benefit from RAM disks are Photoshop, browsers, and video editing software.
Let’s explore how to combine a RAM disk with the Chrome Browser. First, we recommend that you have at least 1GB of RAM free. Ideally, users should have at least 8GB of RAM for a 64-bit system and at least 4GB of RAM on a 32-bit system. But you can get away with less.
A lot of RAM drive software exist. A popular favorite is not free: SoftPerfect RAM Disk.
However, if you just want to get your feet wet, give DataRAM’s RamDisk a try. The free version is limited to 1GB in size. But if you own an AMD-based system, you get a 4GB maximum instead.
How to Configure a RAM drive
Setting up a RAM disk just requires downloading and installing the software. After running the software, you need to configure it with the following options:
Choose the maximum RAM disk size, which is around 1GB. You can use any size but a smaller capacity limits its utility.
Check the box for Set Disk Label. That way, you can identify the disk in the next step. Then choose Start RAMDisk. Configure your browser to read and write cache files to and from the RAM disk.
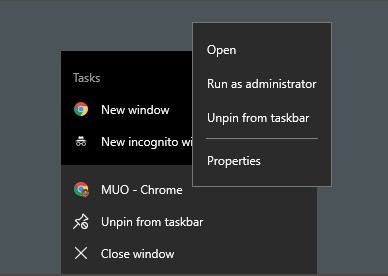
Right-click on your browser shortcut and choose Properties from the context menu. Windows 10 makes it easier than ever to access a browser shortcut. You can do it directly from the Taskbar.
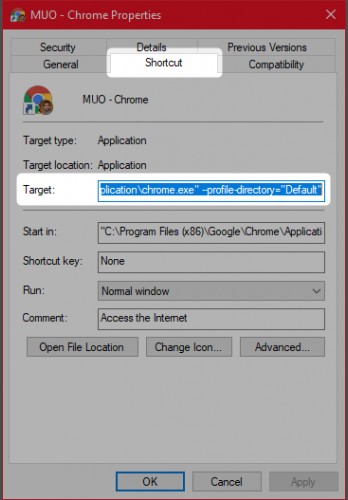
From Properties, choose the Shortcut tab. Then within the Target: text input field, append the following code to the end of the text, where “R” is your own RAM disk drive letter:
–disk-cache-dir=R:\
The complete line of code should look something like this:
“C:\Program Files (x86)\Google\Chrome\Application\chrome.exe” –disk-cache-dir=R:\
Your own code may differ, depending on Chrome’s configuration.
Finally, choose OK and restart your browser. From now on, Chrome will read and write cache files to the RAM disk.
While a few believe RAM drives to be infeasible, the critics make good points. One of the biggest shortcomings is that RAM drives can make your computer shut down slower. And because they run in the background, older computers might not handle the additional overhead very well.
Download: DataRAM RamDisk | Windows (Free)
10. Malware Scanner
We’ve written to death on the subject of malware scanners for good reason: most performance problems originate with malicious programs running wild in the background. Some of the best free malware scanners out there include Malwarebytes, SuperAntiSpyware, and ClamWin.
We have written before about the best free anti-malware clients, which is a good stopping point for anyone with a slow computer.
11. Registry Cleaner
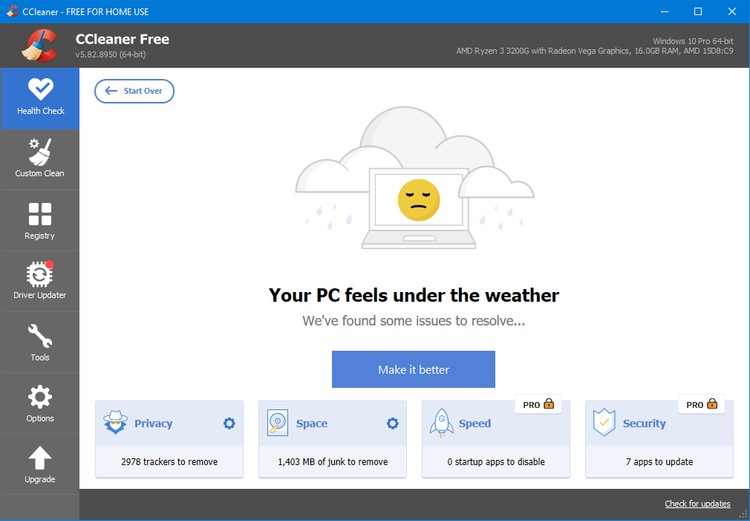
The Windows registry has all the settings for Windows and other programs. Installing software changes the registry. However, sometimes when a program is uninstalled, it fails to remove those changes.
Over time, thousands upon thousands of registry modifications slow system performance. A registry cleaner removes those changes and other leftovers from uninstalled programs.
However, registry cleaners sometimes cause more problems than they solve. While you might see a tiny amount of performance improvement, for the most part, you’re likely to see glitchy OS behavior after running a registry cleaner.
The best program out there to clean your registry is CCleaner. However, Piriform, the maker of CCleaner, suffered a security breach that allowed hackers to slip malicious code into two versions of CCleaner. Current CCleaner products do not contain malware.
12. Speed Up Windows 10 By Removing Bad Apps
A lot of users install horrible software, thinking that they need it. Most of the time, it’s a Potentially Unwanted Program (PUP) that slows your computer down.
Some of the worst offenders include PDF readers, music and video players, browsers, and BitTorrent software. Fortunately, lots of great alternatives exist. The process is simple. First, uninstall the software and, second, install a better program.
Here are a few alternatives you can consider.
- Sumatra PDF Reader
- VLC Video Player
- Google Chrome or Mozilla Firefox
- QBittorrent
PDF Reader Replacement: Sumatra PDF
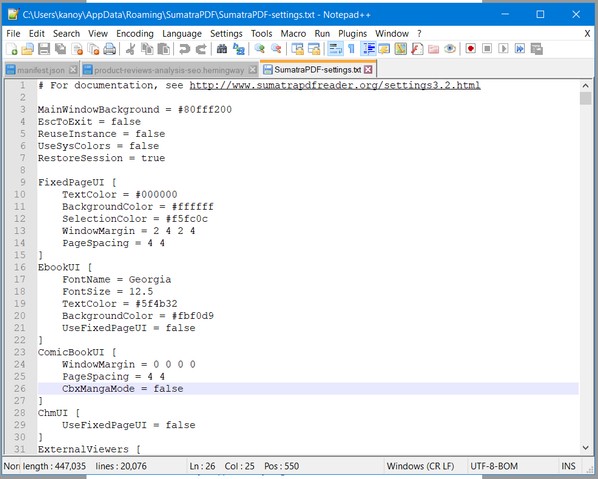
Lots of internet users believe that Adobe Acrobat PDF Reader is the only program capable of reading PDF files. That’s a myth. Because Adobe Acrobat can spread malware, you might want an alternative.
Sumatra PDF Reader is a better alternative to Adobe. I recommend Sumatra to everyone. Not only is it open-source, but it also reads comic books (CBZ or CBR files), blocks potentially malignant scripts, and runs on older systems.
All modern browsers can read PDF files. You may not even need a dedicated PDF reader.
Download: Sumatra PDF Reader for Windows (Free)
Music and Video Players: VLC Player
VLC Player is one of the three best media players ever made.
You could make the argument that better music players are out there. But for video, few can top VLC. On top of that, it is open-source, supports keyboard shortcuts, plays almost any video file, and costs nothing.
Download: VLC Player for Windows | Mac | Linux | Android | iOS (Free)
Browser Replacement: Chrome Browser

Chrome is perhaps the fastest alternative to Microsoft’s Edge or Internet Explorer browsers. It comes in both the standard 32-bit and 64-bit variations. Google even makes an open-source version of Chrome, called Chromium.
Overall, Chrome offers everything that Edge doesn’t: extensibility, security, and speed. If you use the internet often, Chrome ranks among the first apps you should install. However, Firefox offers the same degree of extensibility and it’s 100% open source.
Also, check out the Windows-optimized browser based on Firefox called Pale Moon. Pale Moon works with many Firefox extensions and comes with 64-bit versions.
Download: Google Chrome Browser (Free)
Download: Mozilla Firefox Browser (Free)
BitTorrent Replacement: qBittorrent
For those of you using a horrible, malware-like BitTorrent client, there is hope. Check out the open-source qBittorrent. Unlike the cross-platform BitTorrent client Deluge, it receives regular updates. On top of that, qBittorrent is more fully-featured and includes all the extras of its competitors, without the crazy malware infections.
Download: QBittorrent for Windows | Linux | Mac (Free)
13. Remove Bloatware from Windows 10
The latest version of Windows comes with a ridiculous number of preinstalled apps. Not all of these programs are useful. Remove them with this excellent guide on debloating Windows 10.
In most cases, removing the software does nothing. Most of the apps are placeholders that install themselves upon activation. If you’re not concerned about Microsoft’s bloatware, though, you might want to consider an in-place repair.
In-place repair is most useful for when you want to return your computer to a like-new condition, without reinstalling all of your applications. The in-place repair merely refreshes Windows’s core operating system files.
To perform an in-place repair, perform the following actions:
- Download the Windows 10 Media Creation Tool and run it.
- Choose Upgrade this PC now and then click Next.
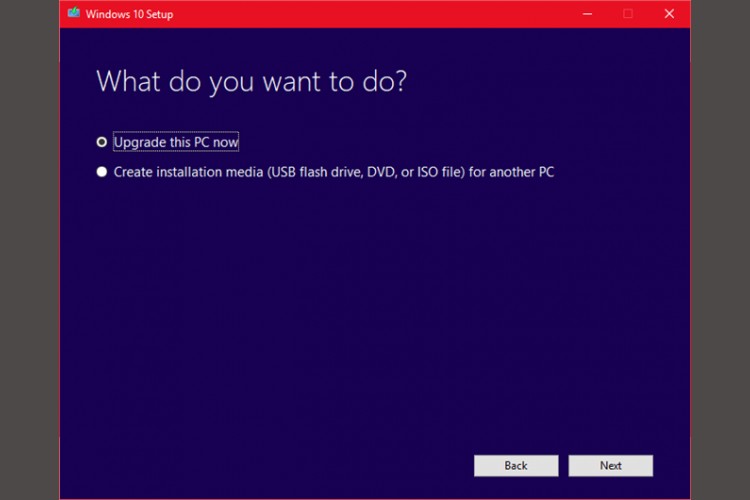
The computer then downloads a copy of Windows 10, which can take several hours. After it finishes, the Media Creation Tool reinstalls Windows 10 on top of itself. If your system has been crippled by malware, or through some other kind of damage to the core OS files, an in-place repair can patch Windows 10, restoring it to a fresher state.
For more information on the process, here’s a video:
14. Remove Windows 10’s Default Apps
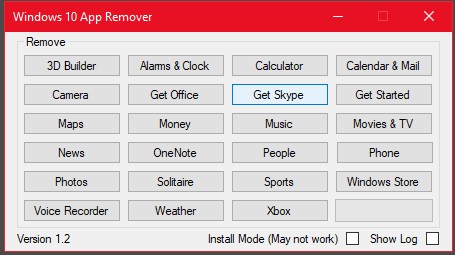
Unfortunately, an in-place upgrade replaces or restores all of Windows 10’s baked-in bloatware (if you remove them). Fortunately, a few apps make debloating Windows easier than ever. Our favorite is the Windows 10 Default App Remover 1.2.
Windows 10 Default App Remover 1.2 can uninstall the default Windows 10 applications. On top of that, its publisher has provided the source code for the application.
To de-crap your computer, simply tap on the app you want to remove. For example, if Solitaire gets on your nerves, just left-click on it in the user interface and you’ll receive a prompt asking whether you intend on removing the app. Confirming removes the application. The amazing thing is that 10AppsManager allows users to reinstall removed software.
The app received clean reports from Norton Safeweb and VirusTotal so it is likely not a source of malware.
Download: Windows 10 Default App Remover 1.2 for Windows (Free)
15. Browser Extensions for Faster Page Loads
My favorite speed hack is improving your browser’s performance through extensions.
User-Agent Switcher Browser Extension
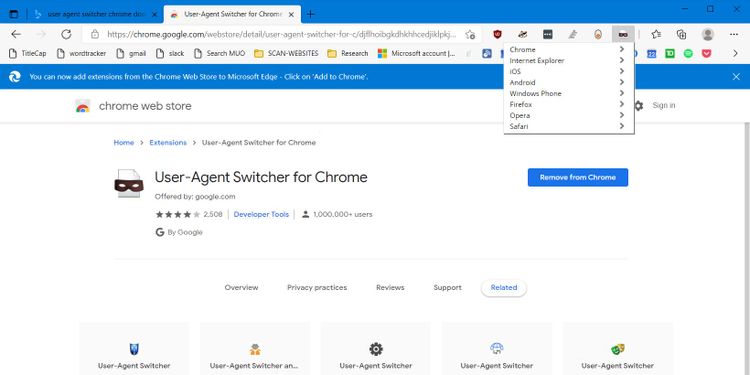
A mobile user agent lets a server know whether your computer is a fast desktop or a slow mobile device. If a server knows you’re using a desktop or laptop, it typically loads more advertising code and visual effects. In other words, you get the slower version of a webpage.
By using a mobile user agent, you can tell the website to give you a faster-loading version of its page. This trick doesn’t work on all websites but it generally improves performance. Unfortunately, it can sometimes cause strange behavior on some websites.
What’s the Best Windows 10 Speed Hack?
The best and cheapest speed optimization tip for most users is the in-place repair. If you don’t mind losing some of your installed programs, a factory reset is another great option. The biggest cause of any slowdown is badly-written programs. And removing or optimizing that software generally resolves most performance issues.
If you are a gamer, then you might want to try performance tweaks to improve the gaming performance on your machine. For instance, you should ensure your PC isn’t clogged with dust to help keep the computer cool and running at its best.
Source : MUO
